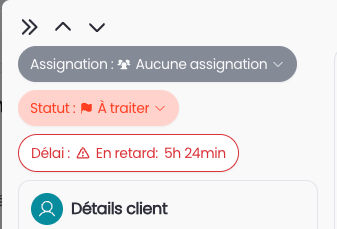
The Processing Time feature allows you to track the time your teams spend processing each conversation. It displays a time counter and visual indicators directly in the conversation list and in the details of each conversation, as long as the status is "To Process".
🚩 Available only in V6
🔒 Page accessible only to the Administrator
role
To enable processing time tracking, go to Settings > General > Processing Time and click the "SLA Enabled" button.
Once the processing time is enabled, you can set the desired processing duration.
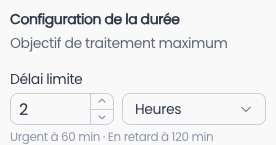
This duration determines the time allowed before an overrun is flagged:
🕒 Urgent — displayed halfway through the defined deadline to alert that the deadline is approaching
⚠ Overdue — displayed when the deadline is exceeded
When a conversation moves to a "Resolved" status, it becomes ✔ Resolved and the timer stops.
The statuses considered as resolved are:
Awaiting customer
Resolved by team
Transferred
⚠ The status "Resolved by diago" is not taken into account in the calculation of the response time.
In the conversations list, the Processing time column indicates the status of each conversation:
Indicator | Meaning |
On time | The deadline has not been exceeded |
🕒 Urgent | Half of the deadline is reached |
⚠ Late | The deadline has been exceeded |
✔ Processed | The conversation has been processed |
A filter allows you to display only conversations in a given state.
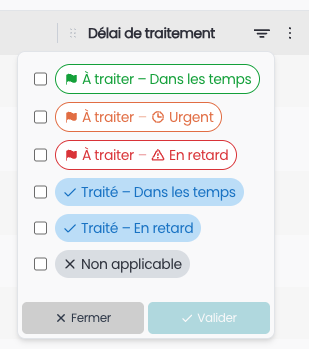
Depending on the conversation status, two cases are possible if the processing time is applicable:
Unprocessed conversation — the time elapsed since the status changed to "To process" is displayed under the status.
Processed conversation — information about the processing time (on time or late) appears in the tags, above the summary.